Photoshop Tip: Batch Export Your Layers to Web-optimized Images
December 11, 2016 by Ian Spangler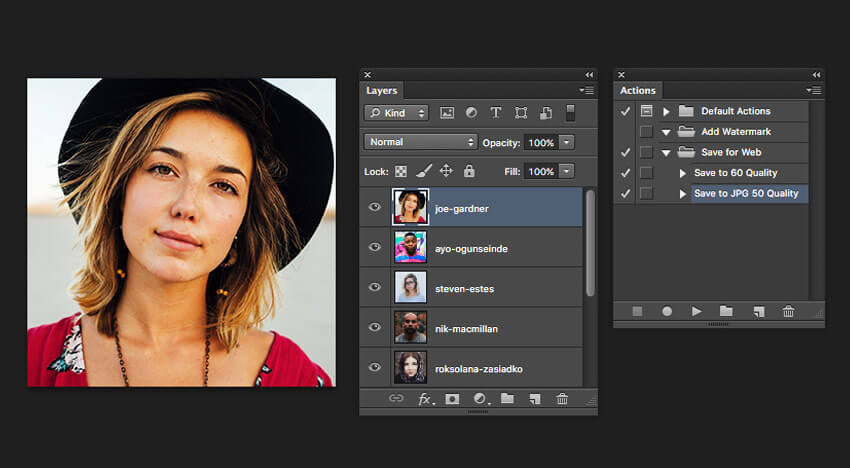
As a Photoshop user, you may come upon a situation where you have a large number of images in a document, each on its own layer, and you need to save all of them as a web-optimized files. You could decide to manually save each one by toggling the visibility of the layers and exporting them one by one, but obviously if you have a lot of layers, this could easily turn into a tedious and time-consuming process. Well, Photoshop has a convenient built-in script called “Export Layers to Files” to handle this very need. However, if you have ever tried it, you will find that the exported images are not optimized for file size, even if you lower the quality setting in the dialog to the lowest possible value. This is a frustrating limitation. So what is the solution?
The answer is that there is not necessarily a single solution, and any approach will likely involve a combination of a few steps given the current limitations of the software, unless you have a bent for Javascript coding and decide to go about creating a modified version of the .jsx file for Photoshop’s export script. However, chances are, even if you happen to have some programming chops or are resourceful enough to wrangle a freebie plugin from someone else, you probably have some specific export settings in mind and going under the hood to achieve your desired results for this one scenario isn’t worth your time. So, here is a solution that combines a few of the powerful pre-set abilities that Photoshop already has built in. This works well for me, and I’ve tested it in version CS6:
Part I
The first part of the process is to actually use the Export Layers to Files as mentioned above to save our non-optimized JPEGs to their own folder.
- First, Make sure all of your layers are named appropriately as the resulting filenames will end up including those names.
- Go to File -> Scripts -> Export Layers to Files.
- In the dialog box, set the destination folder to something unique such as “JPG-original”.
- Enter a filename prefix that works for you such as “image-“.
- You may optionally want to check the box “visible layers only” if you have some layers you want to exclude from being exported.
- Select JPEG for format and leave the default setting of 7 for image quality.
- Click “Run” and wait a few seconds (depending on the number of layers you have) for Photoshop to do its work.
Part II
At this point, you should see a JPEG of each layer in the destination folder you set. For the next part, we will use Photoshop’s Actions to record how we want to optimize our images.
- Open any one of the non-optimized images in Photoshop.
- Go to Window -> Actions.
- Add a new “Set” of actions called “Save for Web” (use menu at top-right corner).
- Create a new “Action” called “Save to JPG 50 Quality” (or something else that specifically defines how you will be optimizing these images for the web).
- Click to confirm and the recording should begin automatically.
- Go to File -> Save for Web.
- Select JPEG,“Optimized”, Quality: 50 in the dialog settings.
- Save the file to a new folder called “JPG-optimized” or something similar.
- Close the document without saving. (Very important)
- Stop the recording by clicking the stop button in the Actions panel.
Part III
By now, you have created an action that can be re-used for any image that you want to optimize in the same fashion, so you would only need to create another one if you have new settings in mind. The last part involves using Photoshop’s Batch script to process the action on all of our images.
- Go to File -> Automate -> Batch.
- Select the set “Save for Web” and the action “Save to JPEG 50 Quality” if not already selected.
- Pick the source folder “JPG-original” (your original destination folder).
- Pick the destination folder “JPG-optimized”.
- Click OK and wait for Photoshop to process all of your images.
That should do it. If you make any updates to your layers in the future, you should now be able to simply follow the steps in parts 1 and 3 and save even more time.